


How to Clean a Firearm

There are countless opinions and guides on how (and how not) to clean firearms, not to mention the endless variety of dedicated cleaning products—enough to easily overwhelm a beginner.
Cleaning a firearm is quite an individual matter in terms of technique and scope. Some shooters simply run a dry bore cleaning rope through the barrel after shooting (and some not even after every session), and that’s about all the cleaning they do. Others take pleasure in the process, regularly disassembling their firearm down to the last screw, cleaning the trigger mechanism and the barrel meticulously in several steps with their own special method. Most shooters fall somewhere in between these two extremes.
In general, proper and regular cleaning has a positive effect on the firearm’s longevity, accuracy, and reliability. How much of an effect—that’s open for debate, leading some to skip certain steps. On the other hand, poor cleaning can have a negative impact, while “good cleaning” can’t be defined by just one specific method that renders all others incorrect. The abundance of guides and subjective experiences readily available online tends to complicate things for beginners, who can easily get lost in it all. That’s why we’ve prepared this article—its goal isn’t to “dictate” the only right way, but rather to present various methods, their pros and cons, describe the tools used, highlight the most critical mistakes, and point out controversial topics.
Above all, Be careful
First and foremost: safety! Before you start cleaning, make sure the firearm is unloaded. The primary operation is cleaning the bore, but other parts of the firearm also benefit from a little attention. For example, if you come indoors from the cold, moisture can condense on metal parts. It’s a good idea to wipe them down, even though modern finishes (or stainless steel) offer excellent corrosion protection and will often “forgive” minor negligence. Don’t forget that moisture also condenses in the space between the barrel and the forend, so don’t overlook it. Most modern bolt-action rifles have free-floating barrels, so you can reach concealed spots by inserting a cloth between the barrel and the forend. If you need to remove the stock for cleaning (or for any other reason), it’s advisable to reinstall it using a torque screwdriver, tightening the appropriate screws within the range specified by the manufacturer—especially if your firearm lacks metal bedding pillars. Overtightening or, conversely, leaving it too loose can negatively affect your groupings.
When it comes to the bolt, wiping down the exterior to remove carbon fouling is usually sufficient. You can use a brush (but not a brass one) on the bolt face and locking lugs. If you want to go the extra mile, it’s worth getting a few plastic scrapers for hard-to-reach areas—they’re ideal because they won’t damage the finish. As for the internal components of the bolt and the trigger mechanism, you should know how to perform a full disassembly if you want to understand your firearm thoroughly. However, these parts generally don’t require regular cleaning—carbon fouling doesn’t typically reach them in bolt-action rifles, and they’re well-protected from external contaminants. Cleaning them only makes sense if you’ve somehow managed to “bury” your firearm in mud. Otherwise, once a year after the main season should suffice. Just wipe the disassembled parts with a cloth and a brush to remove any dirt. Don’t overdo it with lubricants, as they attract debris. If anything, apply a small amount to a cloth and wipe down the parts to leave a thin protective film against moisture—that’s all that’s needed. Many people don’t clean these areas at all and never experience issues, but it all depends on the shooter’s individual habits.
 For bolt-action rifles, wiping down the bolt is usually enough—but if you want to be thorough, you can do so with the right tools.
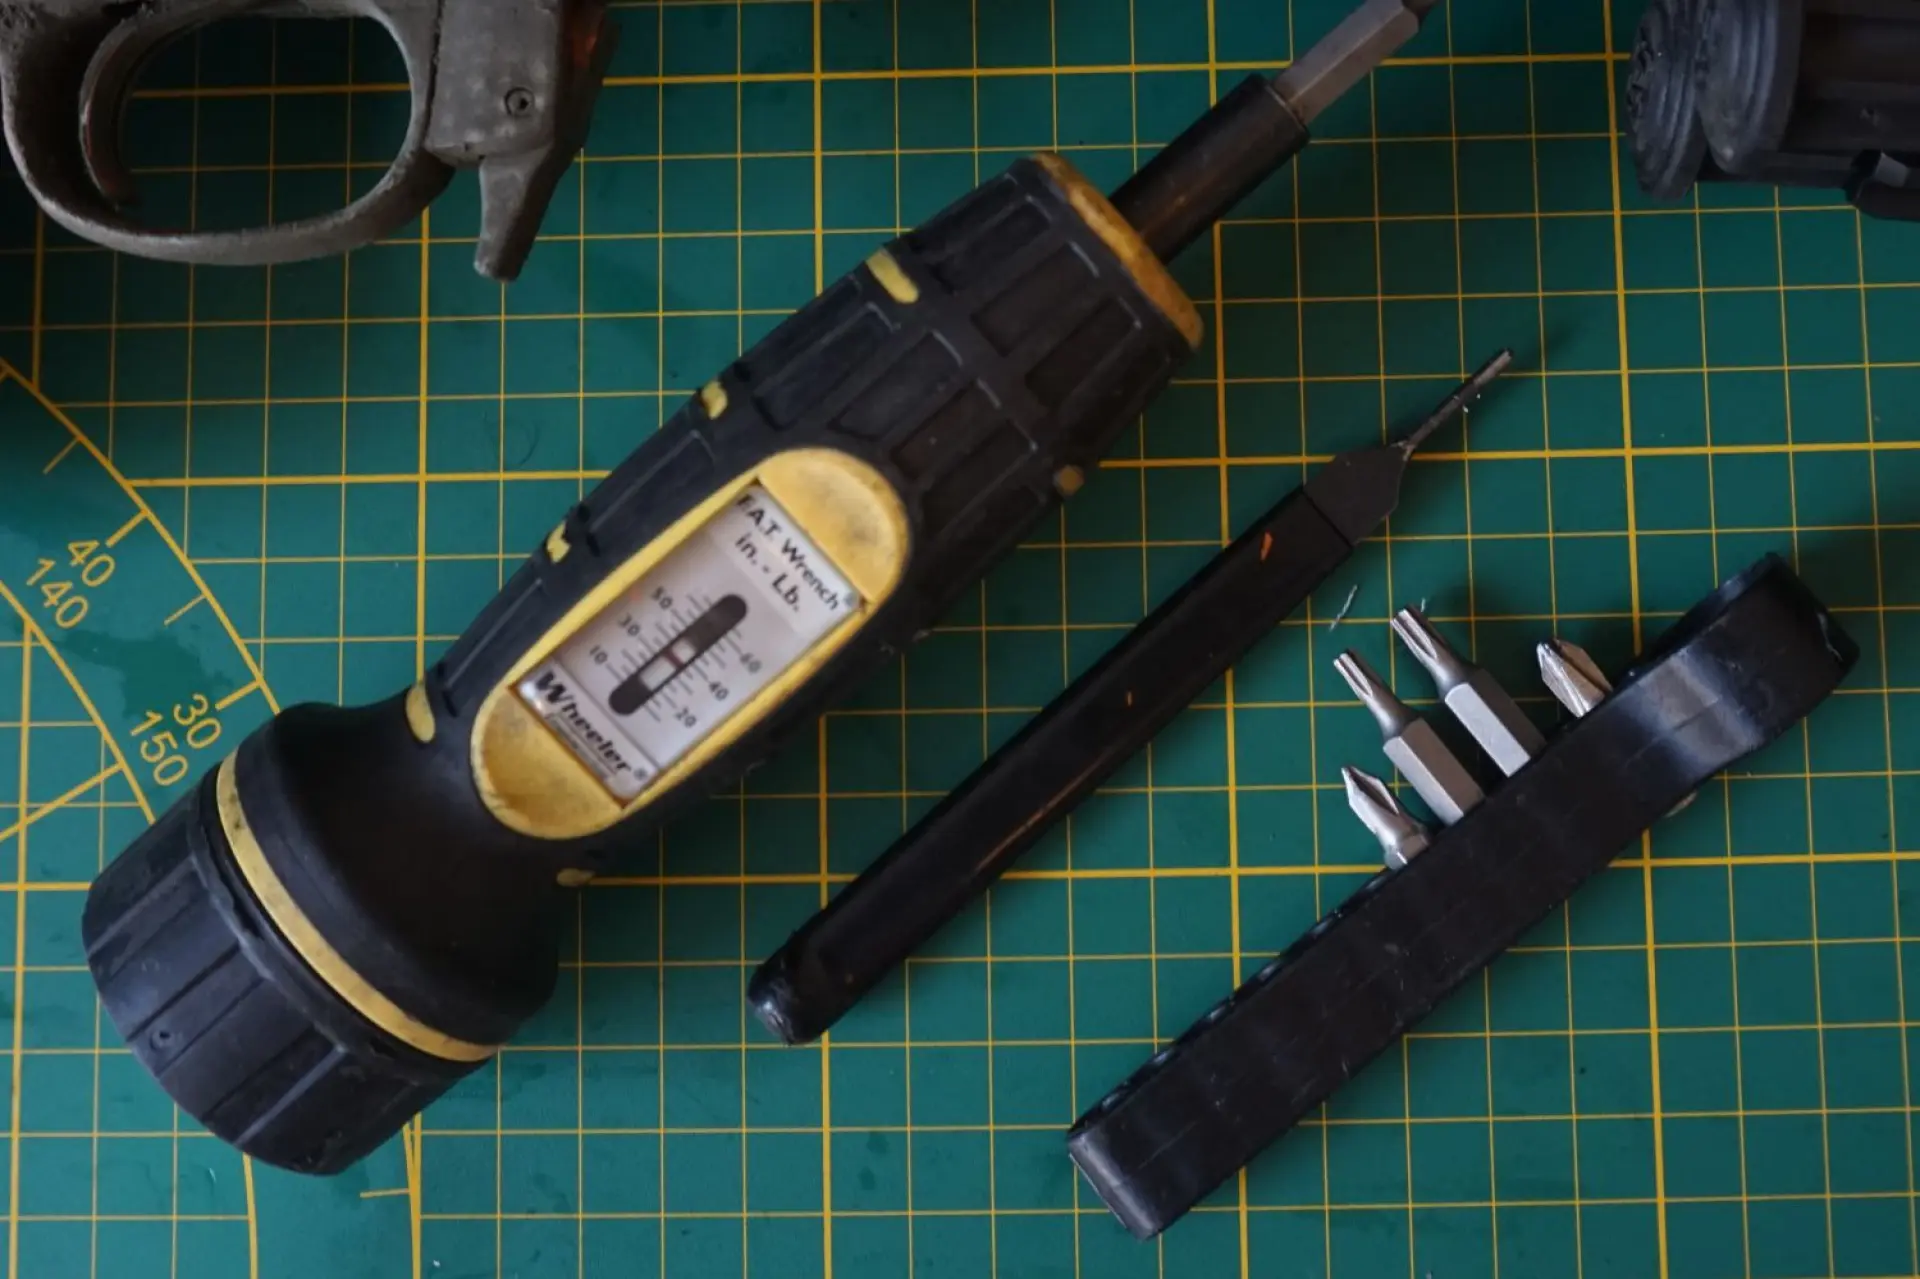 If you remove the stock, it’s advisable to use a torque wrench.
Stocks and preservation
It’s different with semi‑automatic rifles. For those, you’ll want to clean the parts exposed to combustion residues more regularly. Ideally after each shooting session — but in practice, once a month seems a more than reasonable frequency. Equip yourself with a cleaning brush, a scraper, and perhaps a little solvent to make the job easier. In any case: before disassembling for the first time, study carefully how to proceed, and go slowly — in a place where you can easily retrieve any part that might come loose.
Polymer, carbon or laminated stocks only need wiping off with a damp cloth — the material doesn’t degrade and moisture doesn’t hurt it. Yet many hunters still prefer classic wood, which does require proper maintenance. The most important thing is to remove any surface moisture. For an intact lacquered stock, wiping is often enough; optionally you can treat it with a regular furniture‑oil product. For an oiled wooden stock, a simple annual wipe‑down with oil and a polish is sufficient. There are special oils for this purpose, with different tints to match the wood tone — for example, Ballistol Balsin — though many shooters prefer to use their own custom “recipe.”
One special discipline is preservation for long‑term storage. The proper procedure may vary, but the general rule remains: clean the firearm thoroughly and apply a durable lubricant layer to all metal parts — for instance something like Brunox LUB & COR. If your firearm is stored in dry conditions and you don’t expect to store it more than, say, two years, it may be enough to preserve just the barrel and wipe the other parts with a cloth moistened with lubricant. Before next use, remove any preservative from the bore, degrease it, and wipe all external metal surfaces. For very long‑term storage, a heavier grease is often used — but that means that before reactivation you’ll need to clean thoroughly all parts in contact with the grease. Finally: whether you store a gun long‑term or not, it’s wise to keep a dehumidifier in the safe — that’s the best prevention against corrosion.
„Be careful when re‑rifling the muzzle (crowning). This is a rather delicate area of the barrel, and any damage can negatively affect your point of impact!“
Cleaning the barrel
You could do it on a workbench — but for proper barrel cleaning it’s better to have something to clamp the firearm into, ideally a dedicated bench vice or rest. You could also use a carpentry vise, but add a protective pad to avoid damaging the firearm’s finish. For the cleaning itself you’ll need a cleaning rod, a brush, a jag / patch holder, and cleaning patches (we’ll leave solvents aside for the moment). If you buy components individually, ensure they have a compatible thread — the market offers multiple standards. Likewise: each caliber requires the corresponding size brush and rod. Always clean from the breech toward the muzzle (“rear to front”). One reason: the muzzle crown is a delicate surface you want to avoid scratching. Pushing the rod from the muzzle side risks damaging it if the rod is not perfectly straight — pulling from the breech solves that risk. Begin with the brush: screw it onto the rod, pass it down the bore (through the chamber), and run it ~5 times. Next, attach the jag/patch‑holder and pass a patch through the bore and out the muzzle. You can use cotton fabric, or better: single‑use cleaning patches. An alternative is a textile brush (“lacette”), but one‑time patches are more practical and avoid the need to clean out previous residues. There also exist felt‑wool mop heads used with a special jag — the handling is similar to patches, and they give very even contact with the bore; in practice results are comparable.
Run the patch all the way through the bore and discard it. Repeat with fresh patches until they come out clean. Some shooters claim a brass brush damages the bore and recommend only synthetic brushes. That’s not strictly true, provided you avoid aggressive “pumping.” Synthetic (usually nylon) brushes have their place, especially when applying chemical cleaners. A good compromise is a brush from a quality maker such as IOSSO — more durable than conventional nylon and more resistant to chemicals.
 Cleaning rod with accessories.
 Close-up of a chamber brush next to the “standard” bore brush.
Barrel Break-in
If you have a brand-new firearm or barrel, it doesn’t hurt to do a so-called barrel break-in. This basically means more frequent cleaning during the first rounds fired. Initially, the internal surfaces of the bore are still “settling”—they smooth out as microscopic burrs are worn down, and tiny imperfections get filled by bullet jacket residue and powder fouling. The result is less copper fouling later on and longer barrel life while maintaining accuracy. As usual, there are many different approaches. One method is running a brush through the bore after every shot for the first 10 rounds, then after every 5 shots up to a total of 50. Some shooters lightly oil the brush or rope before use; others degrease it entirely, and both might include copper removal using suitable chemistry. There’s no single best method. Personally, I prefer to run a brush through the bore after every shot for the first 10 rounds, then after every 5 shots—at the same time, degreasing with a patch moistened with alcohol, and every 10 rounds applying a copper remover (which must of course be wiped out before the next shot). This process is repeated for the first 50 rounds.
A little about cleaning agents
The cleaning methods mentioned earlier are often supplemented with chemicals — oils for preservation, to loosen fouling, and to prevent corrosion. There are also specialized solvents that dissolve carbon fouling and copper fouling from bullet jackets. Just because the bore looks mirror-clean and a patch comes out spotless doesn't mean there isn't copper fouling left behind — and without chemistry, you won’t fully remove it. Cleaning procedures vary significantly depending on the product — you’ll encounter pastes, powders, liquids, sprays, and foams, each with different methods of application, dwell times, and removal techniques. Always follow the manufacturer’s instructions. Recommendations are tricky, but ThorroClean (742 CZK) has an excellent reputation, though it’s more expensive and demanding. In contrast, Milfoam Forrest Bore Cleaning (344 CZK) is easier to use — it comes as an aerosol foam you spray directly into the bore, let it work, and then run a patch through. Other products are applied by soaking a patch or synthetic brush before running it down the barrel.
When it comes to oils, they help loosen baked-on fouling from the bore. Just apply a small amount to the brush or patch before the main scrubbing. After cleaning, you can also use oil for preservation — again, just a few drops on a patch run through the bore. Trusted brands include Brunox and Ballistol. Avoid using general-purpose oils or chemicals not specifically designed for firearms. While some people use them, it’s safer to stick with products made for guns. It’s also important to note that after using strong carbon or copper solvents, the barrel should be finished with an oiled patch to protect the bore.
 It’s not desirable for chemicals to come into contact with surfaces outside the bore. This can be avoided by using a so-called “bore guide”.
The “Oily first shot” problem
Using oil comes with a known drawback: the “oily first shot” issue. If you fire a round through an oil-coated bore, the first shot may impact differently compared to subsequent shots. The extent of deviation depends on various factors, but it can result in a bad hit — something no one wants, especially hunters. This is why some precision shooters clean their bores as rarely as possible — to preserve consistency. Hunters, however, use firearms differently and complete avoidance of cleaning isn’t practical. You can avoid the “oily first shot” effect by running a dry patch, cleaning cord, or pull-through like a Boresnake through the bore before a hunt. For best results, run a patch moistened with alcohol or degreaser, followed by a dry patch. Alternatively, simply avoid using oil in the bore altogether. If your bore is clean, your gun safe is dry, and you handle the firearm at least once a month, then preservation oil may not be necessary.
When applying chemicals, it’s essential to prevent them from contacting areas outside the bore. That’s the role of a bore guide — a tube inserted into the action that centers the cleaning rod and keeps it aligned with the bore axis. Many bore guides also include a port for inserting patches or applying chemicals or oil, making the process cleaner and easier.
 Patches in Various Stages of Use.
„Much faster and easier than cleaning with a rod is using a cleaning cord, commonly known as a 'Boresnake' — after the product by Hoppe’s!“

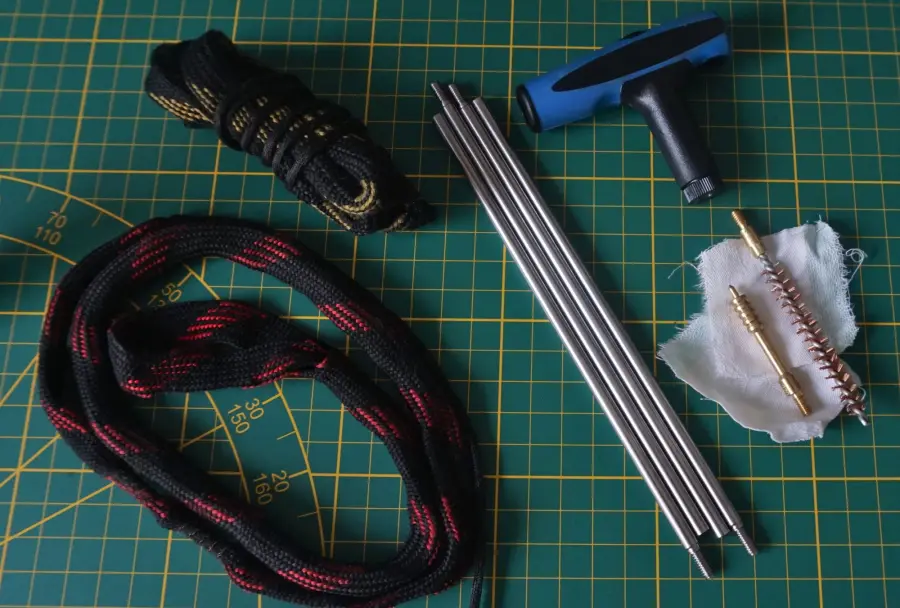
The author’s cleaning kit
My previous “working” bolt-action rifle (Ruger American .308 Win), used for typical hunting distances and mostly range fun, received minimal care by design—to save time. After shooting, I would only pull a rope through the barrel and occasionally wipe down the bolt. Despite this, up to around 4,000 rounds, it consistently grouped around 1 MOA, and apart from ammo-related malfunctions, it never failed or jammed. I later sold it with over 5,000 rounds through it, still accurate enough for hunting. With my AR, I intentionally skipped bolt cleaning at first, curious how long it would take to affect reliability. The result: about 800 rounds over three months without issues. I’m not the only one with similar experience. Eventually, you start to take exhaustive cleaning rituals with a grain of salt. I still have a few rifles, including one hunting gun, where I limit cleaning to pulling a rope through the barrel after shooting and doing a full clean once a year. However, for precision shooting, I maintain two rifles—one bolt-action and one semi-auto—with extra care.
I use a Birchwood Casey cleaning kit (1 785 CZK) together with a Bore Guide from the same company (199 CZK) and both original Boresnakes and their copies. As for cleaning chemicals and lubricants, I’ve had excellent experience with Milfoam Forrest products.
 The author’s gear.
All of the above-mentioned tools can be purchased from STROBL.CZ s.r.o. (see strobl.cz)
Photo sources: Author’s archive, manufacturer materials
Author: Tomáš Prachař